
Flex messages, campaigns, and analytics are now available
- Published
- App version
- v0.2.1
You can now send Flex messages from Flow, and campaigns, analytics, a dashboard, and new linking entry points have been added.
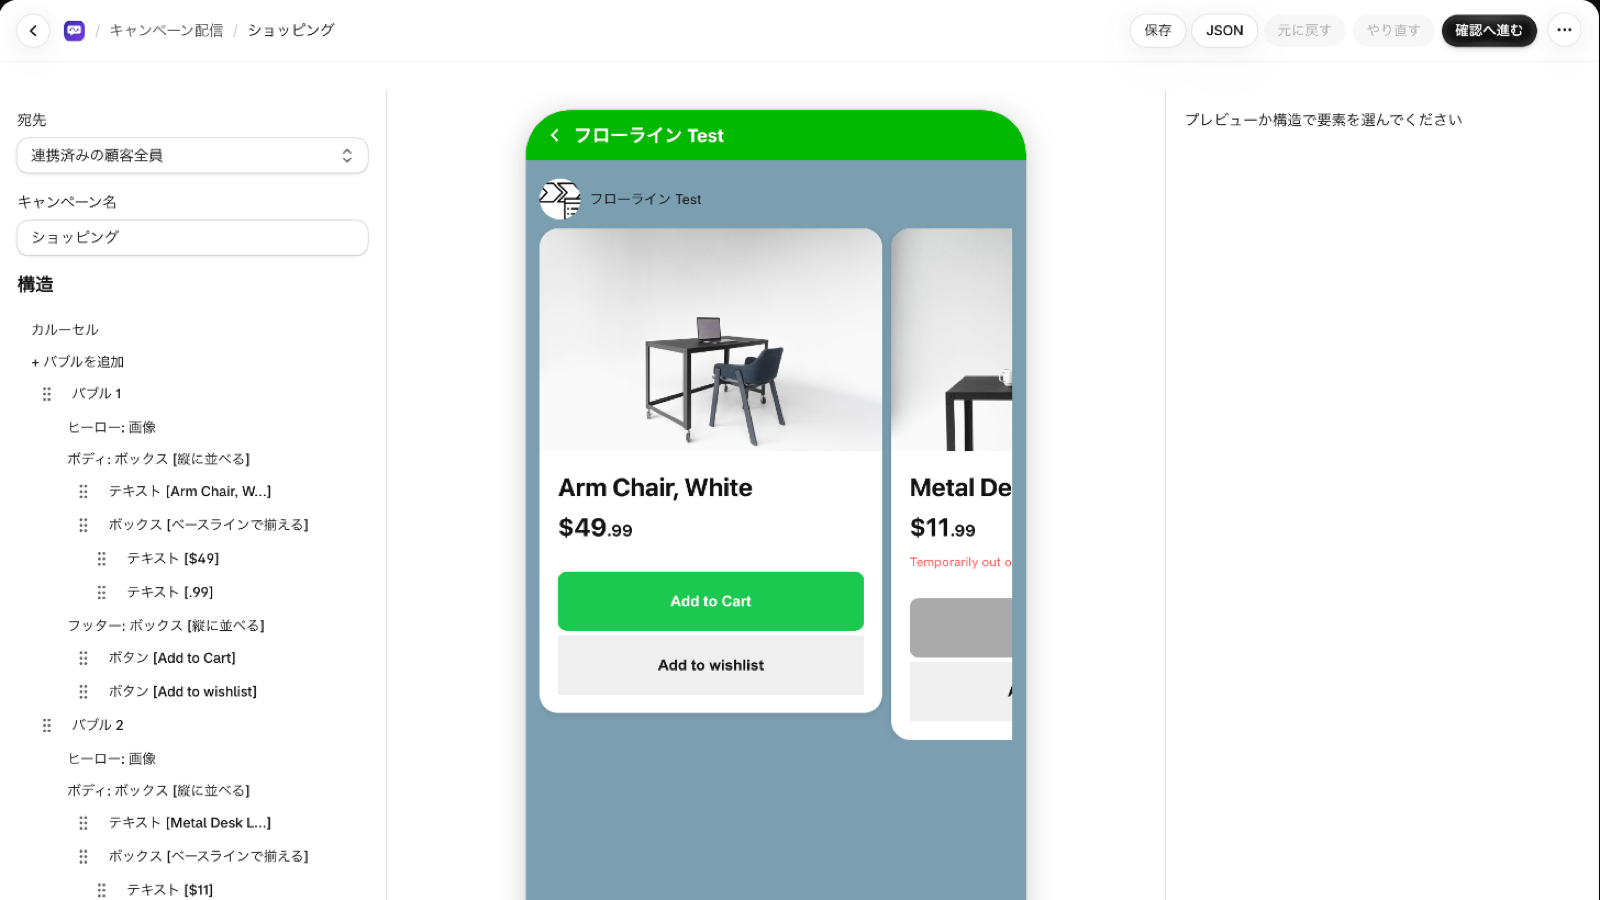
JustFlow for LINE has gained five major features. Until now, it was an app for “sending LINE text from Flow”. Now you can send messages with images and buttons, send to many customers at once without Flow, and check results after sending, all inside the Shopify admin.
This article explains what each feature does and where to start.
1. Send Flex messages from Flow
A new action has been added to Shopify Flow: the Flex message action (shown as “LINE で Flex メッセージを送る”). A Flex message is a LINE message built by combining images, buttons, and table-like layouts. You can send order confirmations and shipping notices in a format that is easier to read than plain text.
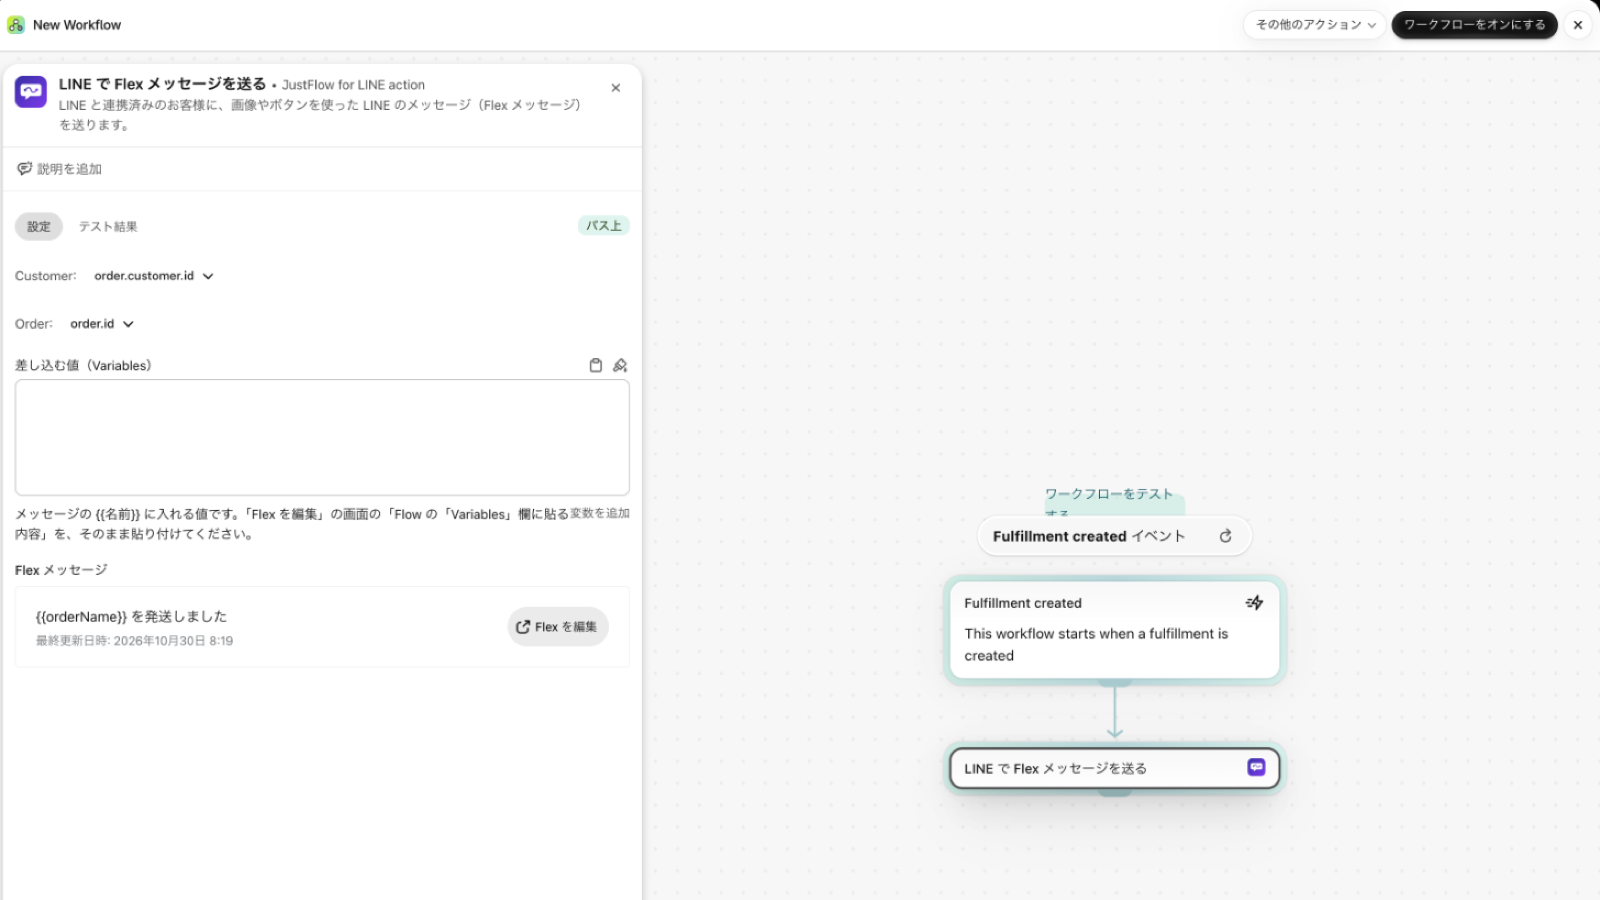
It works almost the same way as the text action.
- Add a trigger to the Flow workflow (for example, order created or fulfillment created).
- Add the Flex message action (“LINE で Flex メッセージを送る”) after it.
- In the action settings, specify the customer to send to, and choose the message to send from “Edit Flex”.
- Turn on the workflow.
Messages go only to customers who have linked LINE. Customers who have not linked yet are skipped, and the workflow run does not fail. The existing text action, “Send LINE message”, continues to work as before.
2. A visual Flex editor and templates
You create Flex messages in the app’s Templates. A preview close to the LINE screen appears in the center, so you can build the message while watching it. No JSON is required.
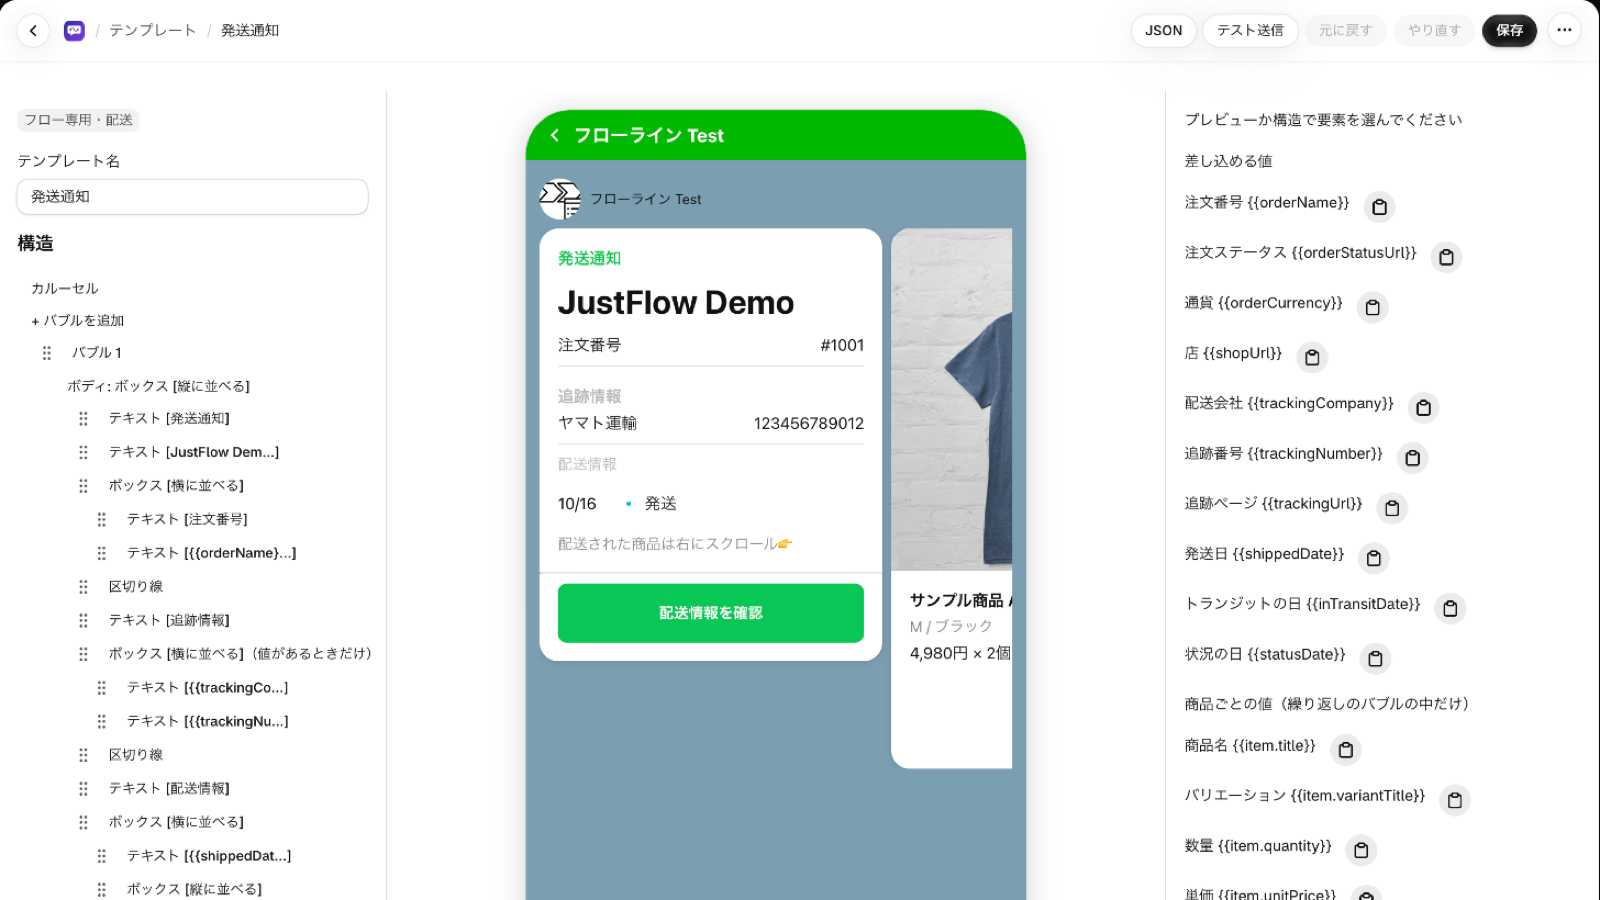
- Structure on the left: The order of the message’s parts (text, images, buttons, separators, and so on). You can add parts and reorder them with the drag handle.
- Preview in the center: Shows the message you are building, close to how it looks in LINE.
- Panel on the right: Settings for the selected part, and the list of values you can insert (order number, carrier, tracking number, and so on).
You can also start from templates for order confirmations and shipping notices. Use “Test send” in the editor to send the message you created to the LINE account of a staff member registered as a test recipient and check it.
3. Campaigns
Campaigns has been added, so you can send messages to many customers at once without Flow. It is suited to messages that are not tied to a specific order, such as sale announcements or new product introductions.
The steps are as follows.
- Create a campaign in Campaigns.
- Choose a template and finish the message in the editor.
- Choose the recipients.
- All linked customers: Customers who have linked LINE through JustFlow for LINE
- LINE audience: An audience created in places such as the LINE Official Account Manager
- Check the content on the confirmation screen, then send now or schedule a date and time.
4. Analytics and Dashboard
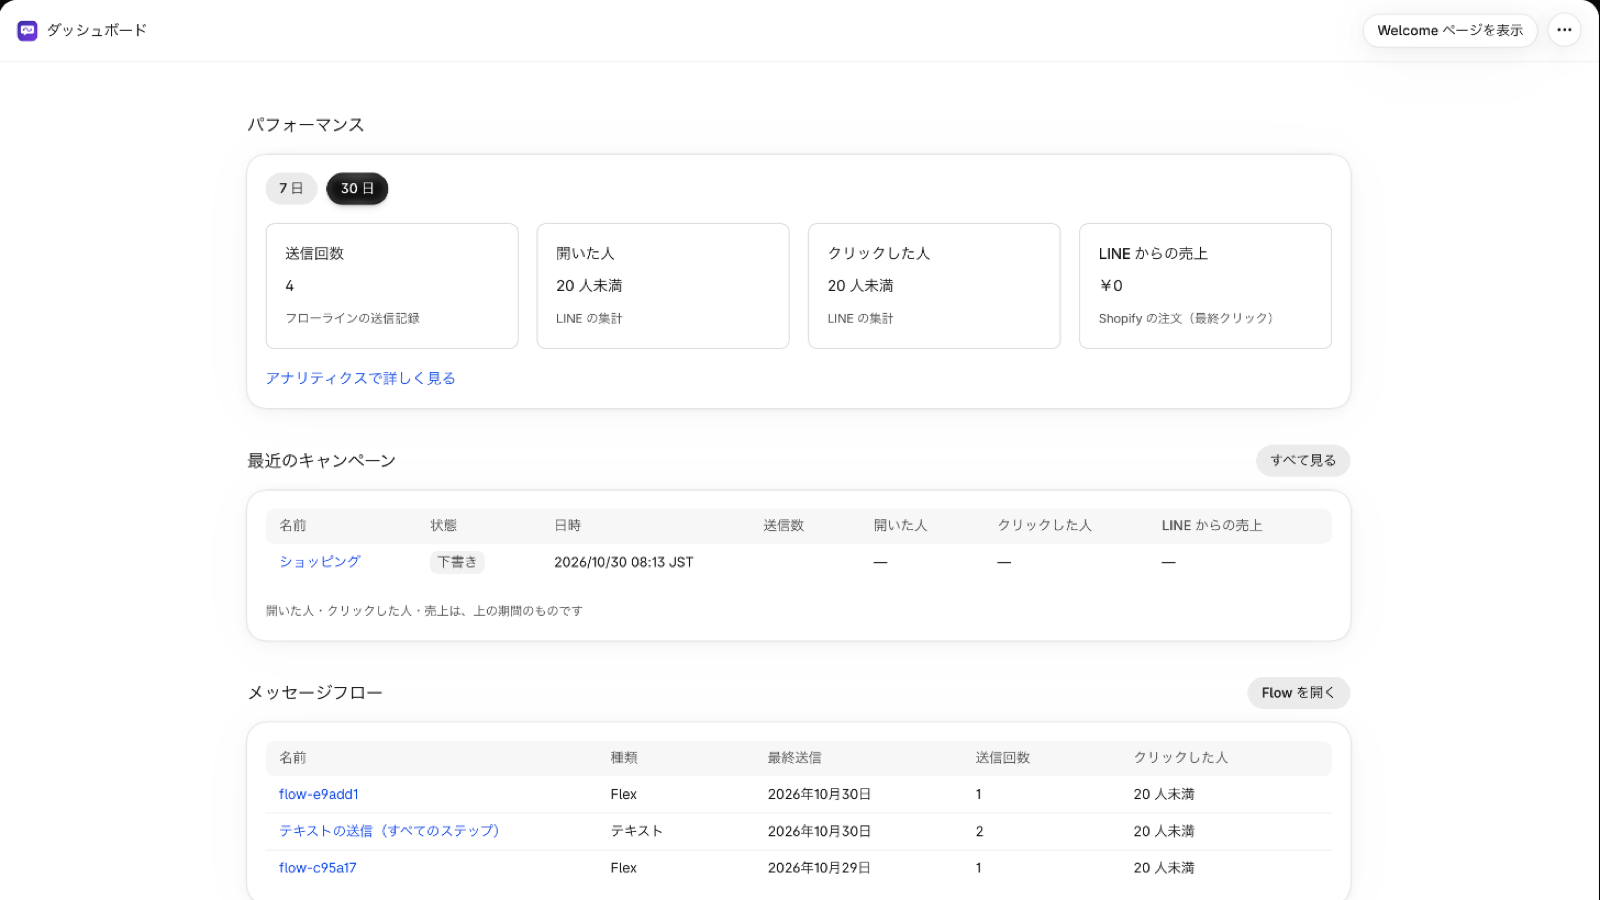
You can now check the results of the messages you sent inside the Shopify admin.
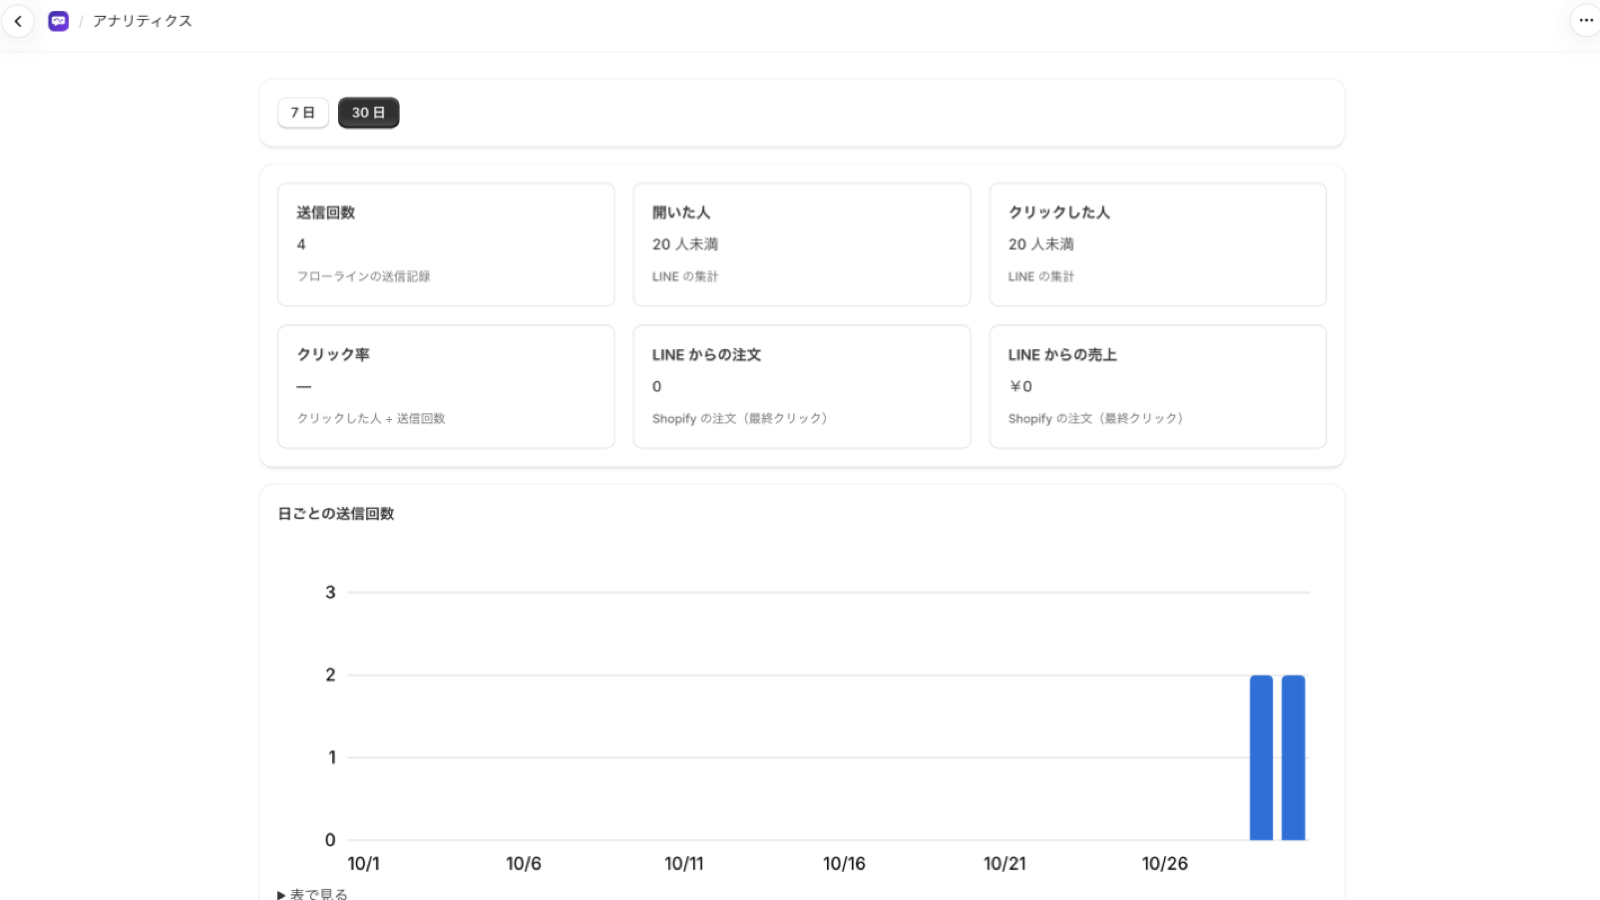
- Sends: The number of messages JustFlow for LINE sent
- People who opened and people who clicked: Counted by LINE
- Orders and sales from LINE: Counted from Shopify orders (attributed to the last click). Shown only when you have granted permission to read orders
The app’s home is now a Dashboard that brings these together. You can see recent results, recent campaigns, and the list of messages sent from Flow on one screen.
5. More linking entry points
Until now, entry points for customers to link LINE were the thank you page and the order status page. You can now also place them in these locations.
- Online store theme: In the theme editor, you can place the JustFlow for LINE block on any page.
- Profile page of the customer account: Customers can link from their own account.
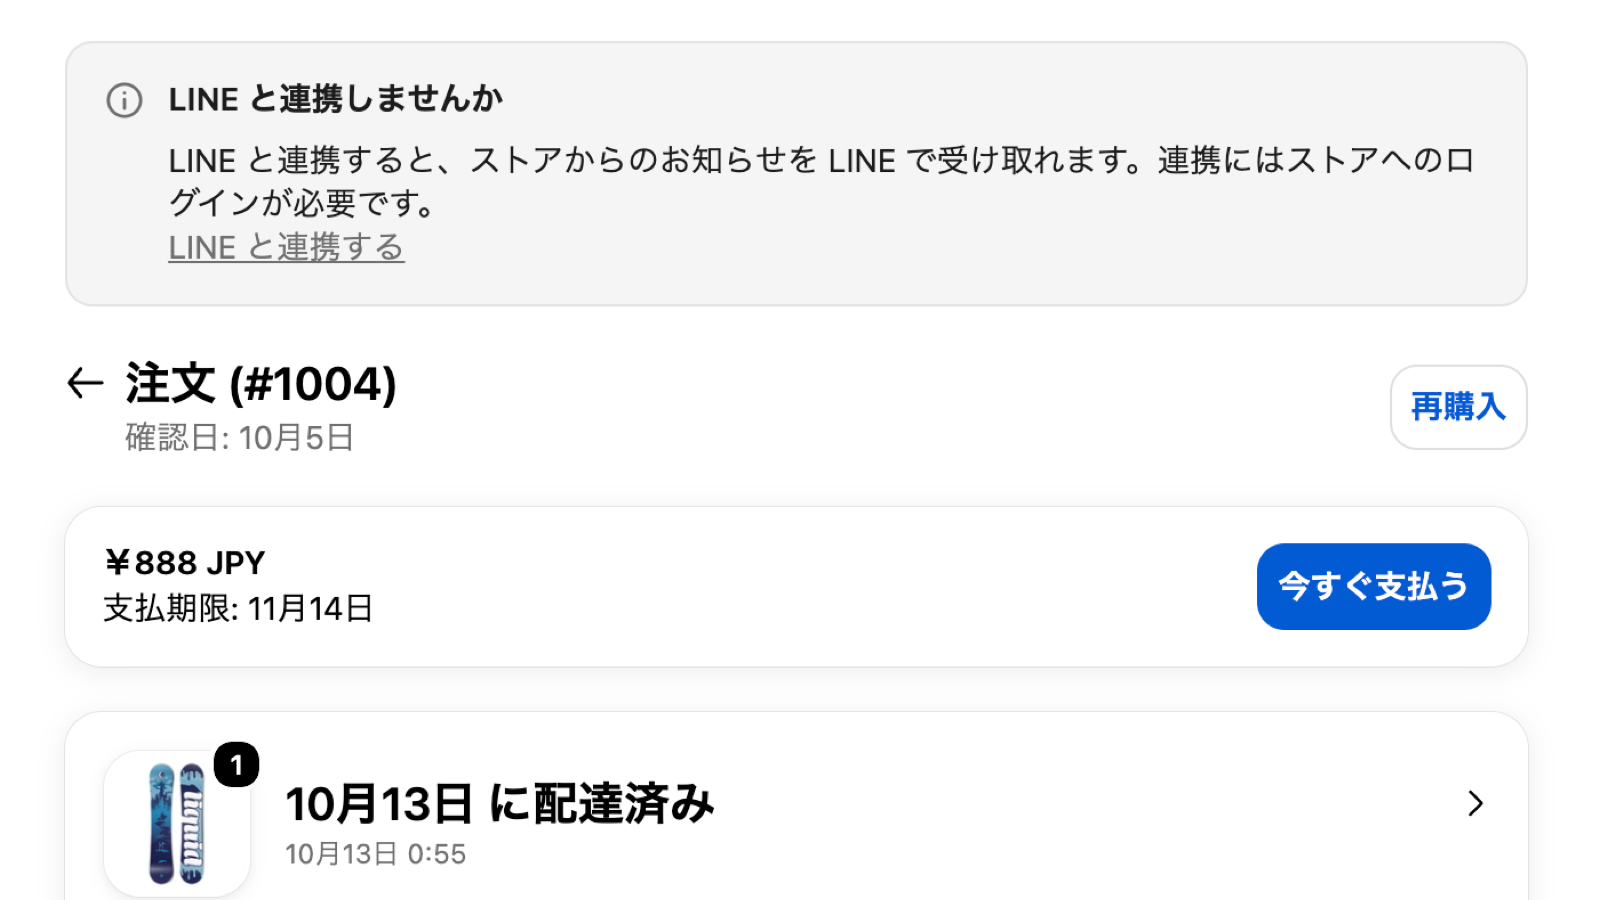
More entry points give customers more chances to link. For how to place them, see “3. Let customers link their LINE account” in Getting started.
Summary
- From Flow, you can send Flex messages in addition to text
- You can build Flex messages in the editor while watching a preview
- With Campaigns, you can send to many customers at once or schedule sends
- With Analytics and Dashboard, you can check results after sending
- You can also place linking entry points in your theme and in customer accounts
Details for each feature are on the Features page.